
Maintaining SSL certificates has always been a tricky prospect. The process used to involve paying a few hundred dollars to a Certificate Authority, who would then issue an SSL certificate for you to install on your servers. Very little automation existed.
When Let’s Encrypt launched nearly 10 years ago, it was a godsend for SysAdmins and DevOps folk. Automated certificate creation? Automated renewals? Wildcard certificates? For free?! Yes, please, and thank you.
Let’s Encrypt uses HTTP-01 ACME for validating and re-validating a server’s SSL certificate. This is great for hosted websites as port 80 is open for web traffic anyway. This is not-so-great if you’re hosting web services behind a VPN or on a local network / intranet, or if you’re running non-web services on your server such as email. This method also can’t be used to issue wildcard certificates.
This is where DNS-01 ACME comes to the fore. It uses a DNS challenge to ensure that you have control over your domain, and can create TXT records in response.
Since we use DigitalOcean for the vast majority of our services, I’ll be showing you how to use DNS challenges with DigitalOcean’s API on an Ubuntu or other Debian-based Linux system. You’ll need to ensure that you have sudo access to your system before beginning.
Install Certbot on Ubuntu using Snaps
Install Snap
sudo snap install core; sudo snap refresh coreInstall Let’s Encrypt Certbot
sudo snap install --classic certbotSymlink the Certbot snap
sudo ln -s /snap/bin/certbot /usr/bin/certbotInstall DNS challenge plugin
Allow the Certbot snap access to root (to install DNS plugins)
sudo snap set certbot trust-plugin-with-root=ok
sudo snap install certbot-dns-digitalocean
Install Certbot on Ubuntu or other Debian systems without Snaps
Install Let’s Encrypt Certbot
sudo apt update
sudo apt install certbot
Install DNS challenge plugin
Install certbot-dns-digitalocean python plugin
sudo apt install python3-certbot-dns-digitaloceanCreate an API key in DigitalOcean
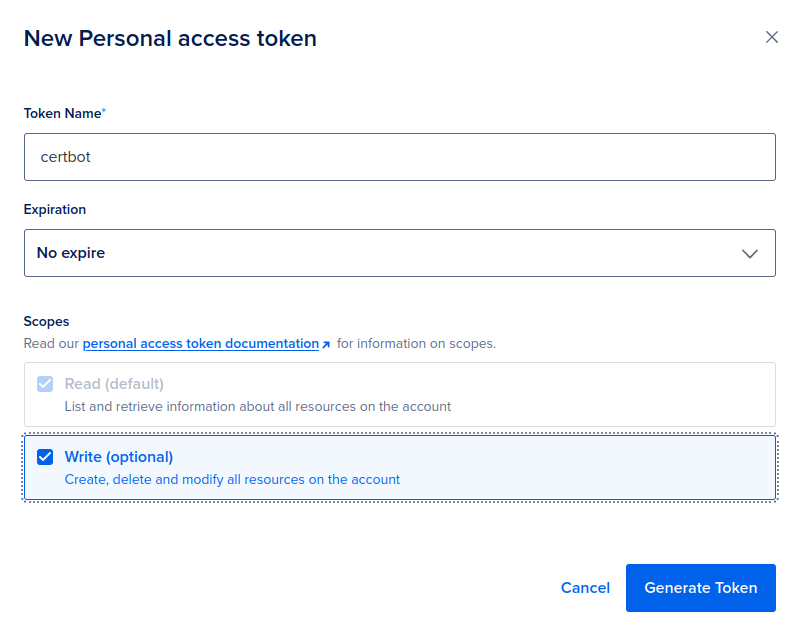
Log in to your DigitalOcean account and visit the API section to create your new API key. Make sure to enable Write permissions so that new DNS TXT records can be created, and then click on "Generate Token".
Save the key in a file called .digitalocean-dns-letencrypt.ini in /root in the following format
# DigitalOcean API credentials used by Certbot
dns_digitalocean_token = dop_v1_xxxxxxxxxxxxxxxxxxxxxxxxxxxxxxxxxxxxxxxxxx
Set read and write access to the file for the root user only
sudo chmod 600 /root/.digitalocean-dns-letencrypt.iniAutomation with Cron
Edit the root crontab
sudo crontab -eAdd the following lines
0 4 * * 0 certbot certonly --dns-digitalocean --dns-digitalocean-credentials /root/.digitalocean-dns-letencrypt.ini --email certbot@example.com --agree-tos --non-interactive -d example.com -d *.example.com
5 4 * * 0 systemctl restart dovecot postfix apache2 spamassassin
Certbot will now run every week on Sunday at 04:00, and associated services will be restarted 5 minutes later at 04:05. The second line restarts services that use the certificate. For example, if you're using Nginx instead of Apache, ensure that systemctl restart command reflects this. Make sure to set the email (--email) and domains (-d) appropriately.
And there you have it! Your system will now check your certificates on a weekly basis and renew automatically if needed.
Are you still renewing your certificates manually? Don't really want to go through this process? That's OK!
Get in touch with us using the button below and we'll be happy to help you out.
